Main Content

Uploading Group Logos

  1. Portal Training Manual
  2. Payer
  3. Uploading Group Logos

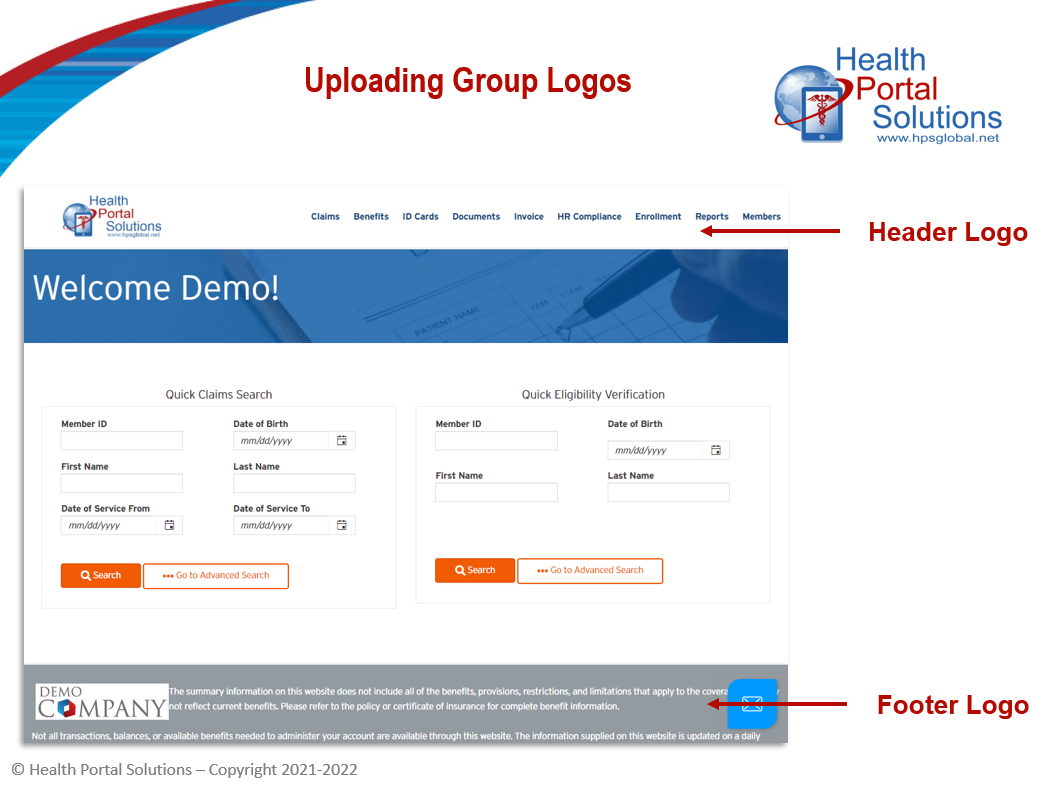
When your clients want to see their logo in the portal, or when you want to show logos for your different products, this tool will help. Learn the easy steps to loading your client logos to your web portal.


Audio Description of Video

Scene 1 – Opening Slide

[Title: 2 Minute Training: Uploading Group Logos]

[Chipper background music plays]

Welcome to Health Portal Solutions’ training on uploading group logos.

Scene 2 – Slide 2

Your portal lets you upload your clients’ logos to the web portal header and footer. By seeing their own logo in the portal, your clients will have a greater sense of ownership of the portal. Also, by private-labeling the portal for them, you can improve your company’s stickiness with your clients.

Here’s how to upload group logos to your web portal.

Scene 3 – Slide with Logo Options

You can upload group logos to display in the header or footer of your portal. When you upload a logo, it will replace the logo that is currently displaying.

Scene 4 – Control Panel Clicks

To upload a group logo, go to the Control Panel and select either the Footer Logo or Header Logo option.

Open up the hierarchy on the left. At the top of the hierarchy is your company, and listed beneath are all your groups.

When a logo is uploaded at this top level, it will automatically display for all of your clients. In this case though, since the logo is specific to one of your client groups, select that group and the logo will only display for users tied to that group.

On the right, you’ll see the pixel size requirements for group logos. Once your group logo is sized to these requirements, click the Add Logo button.

Select the logo you’d like to upload and click Open. Then, at the bottom of this page, clickSave.”

Scene 5 – Employer Portal w/ Logo

The group logo has now been uploaded. Now when users tied to this group log in, they will see the group logo you’ve uploaded.

Log into your portal today to customize the portal logos for your clients.

Scene 6 – Closing Slide

Thanks for watching this Training. Contact HPS Support for any other questions.

[End Audio Description of Video]